
How to replace your zip slider using the snip & staple method
When your zip is playing up, the first thing to do is to work out what has broken. A broken slider or a broken zip can both mean the zip stops functioning.
If it's obvious, for example the slider has come off the rails or is missing its pull - ideal, a slider replacement it is! If it’s slightly more cryptic, here is a summary of what you can watch out for:
Common damage to sliders: slider spreading/distorting in shape, the slider wearing out in its internal surfaces (and not engaging properly with the zip), and finally corrosion.
Common damage to zips: the main vulnerability of zips are the teeth/coil, the tape along the sides, and finally the pins & boxes at the bottom of the zips.
When fixing up a non-functioning zip, the most simple solution is to replace the slider. However if there is damage (rips, distortion, missing pieces) to any of the zip parts mentioned above it’s likely the whole zip sadly needs replacing.
If you are unsure of where the damage lies, feel free to get in touch for advice here.
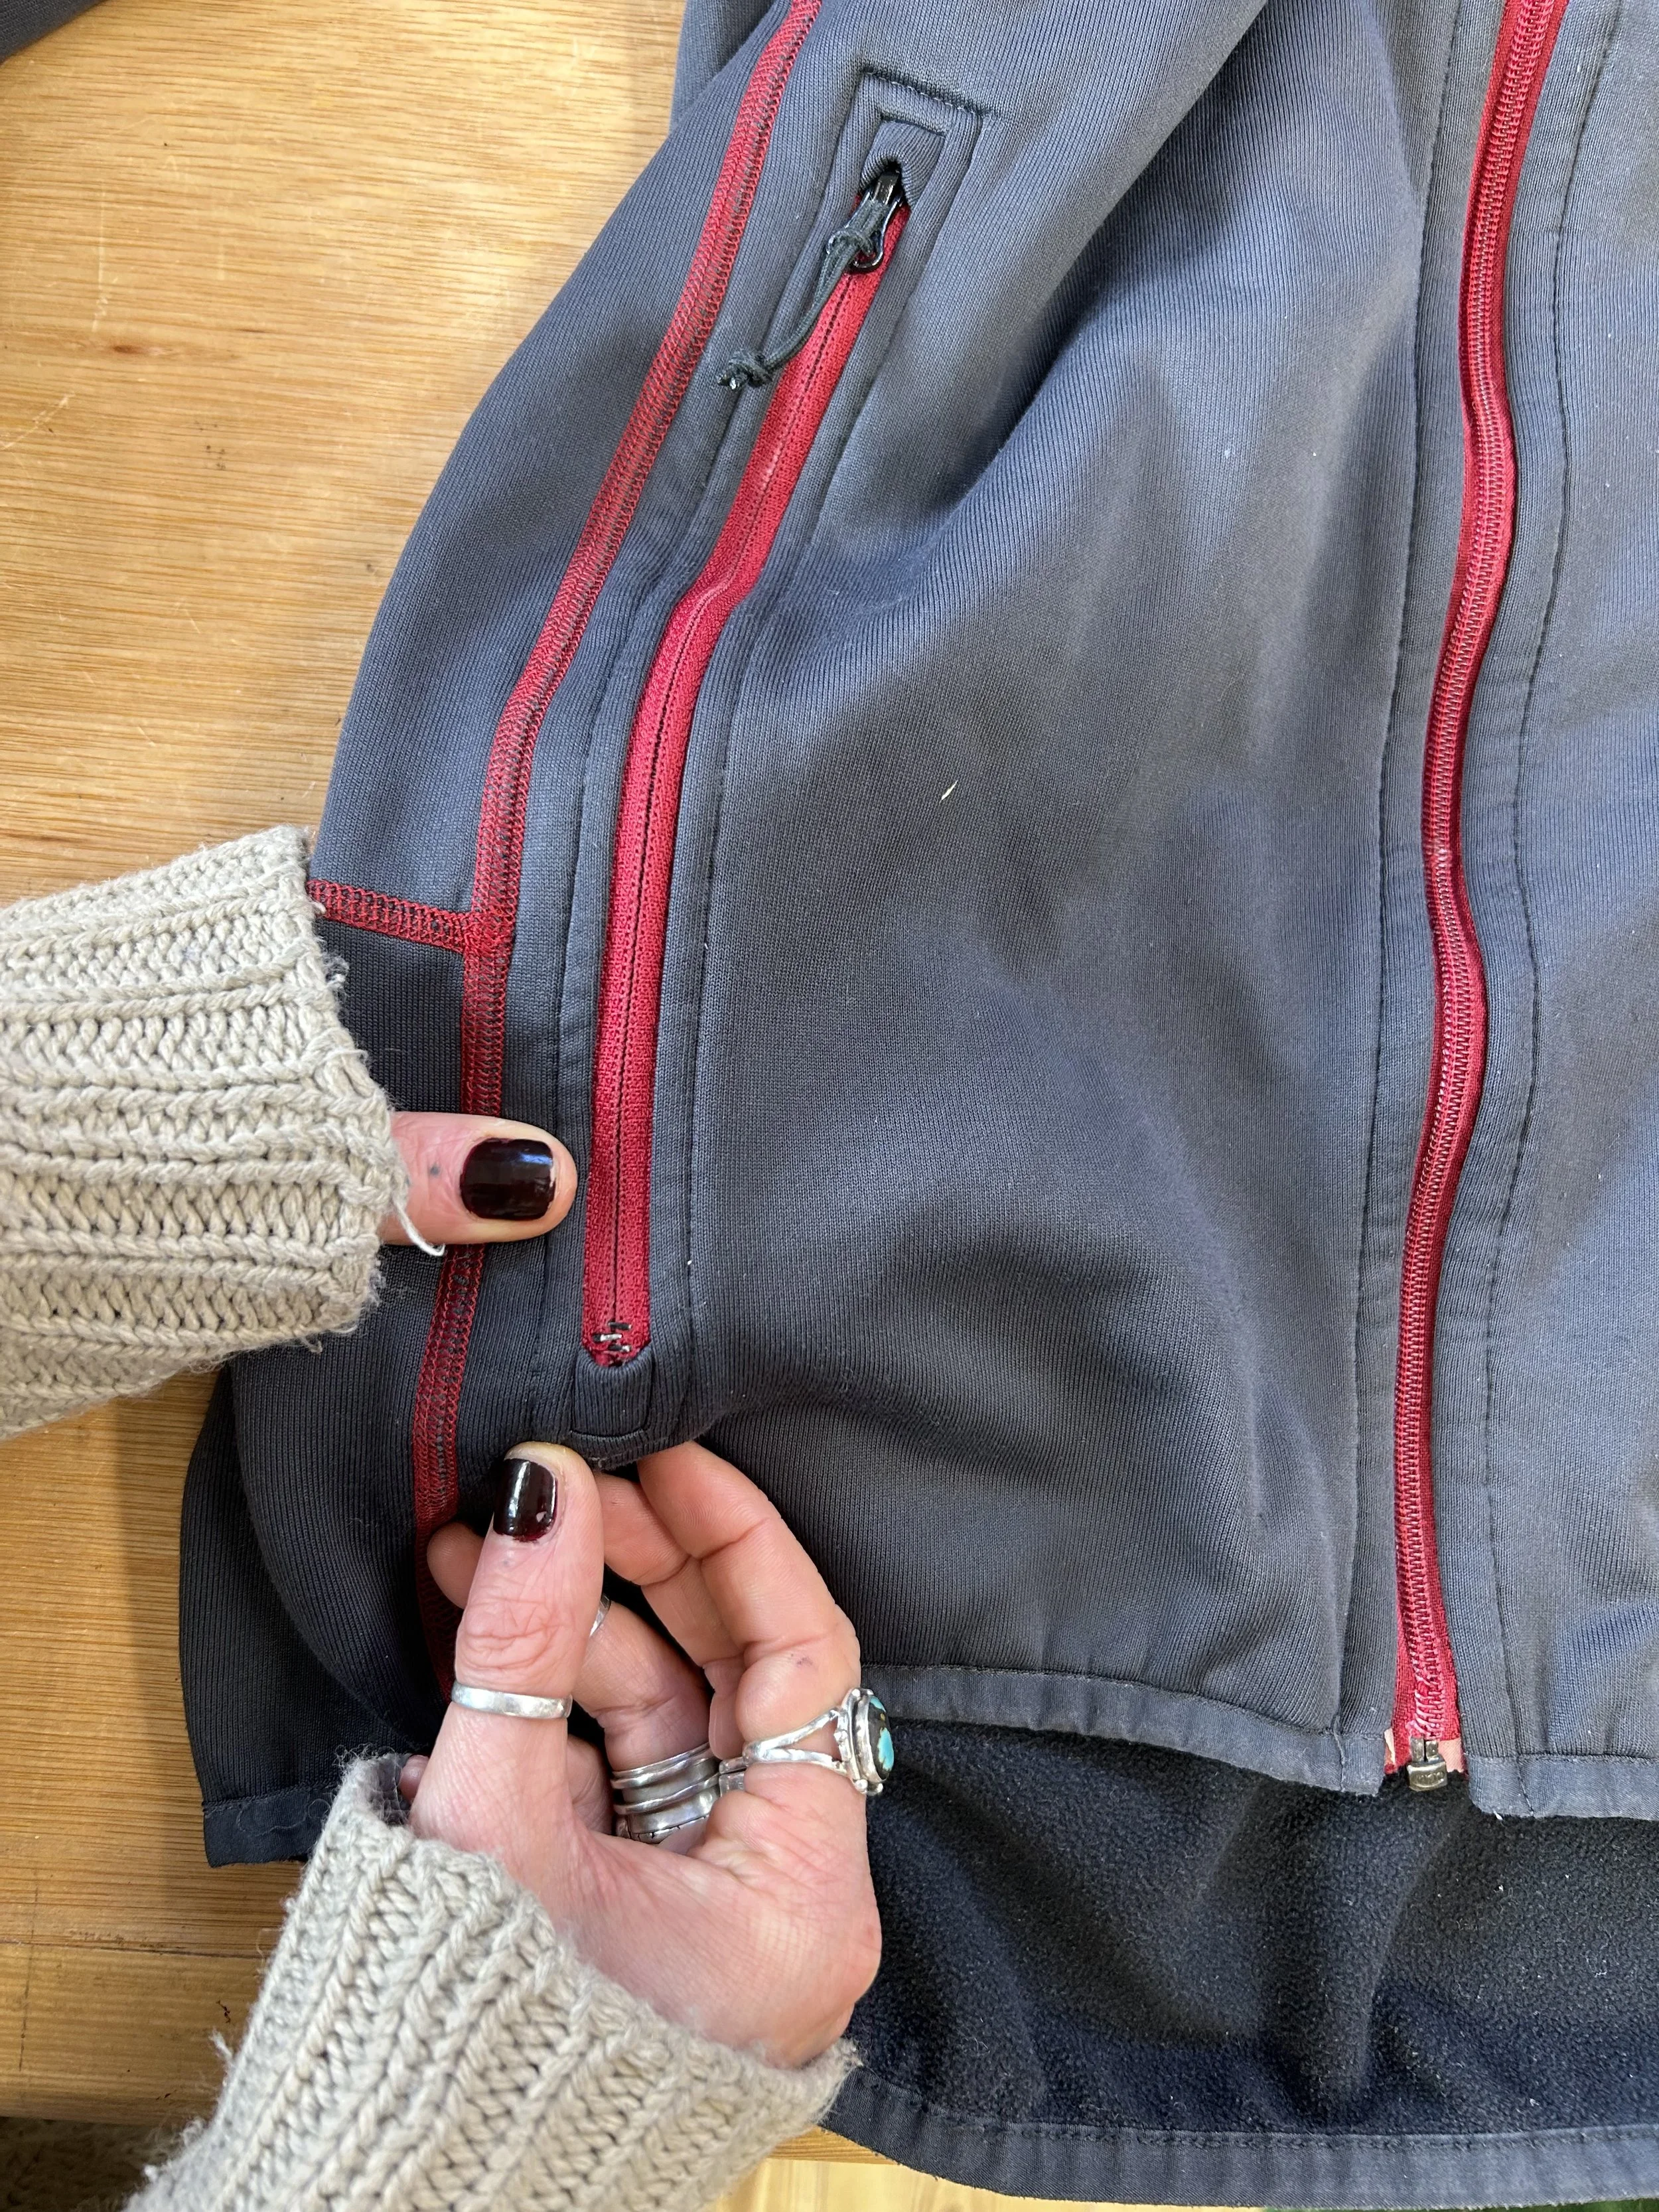
The snip & staple method is useful when a slider needs to be replaced on a closed ended zip. It is particularly useful for pockets.
The method creates a small cut across the zip, allowing the slider to be threaded on, then uses a staple to close and secure the opening.
You will need:
Pliers
Snips
Sliders (we recommend williamgee, profabrics & makeyourowngear)
Before you start
First check:
The zip itself is in suitable condition.
The slider is the correct size/type or you have identified a suitable replacement.
The direction the zip normally closes.
If the zip is damaged beyond the slider you may need a full zip replacement.
Get in touch with us here to book a repair.
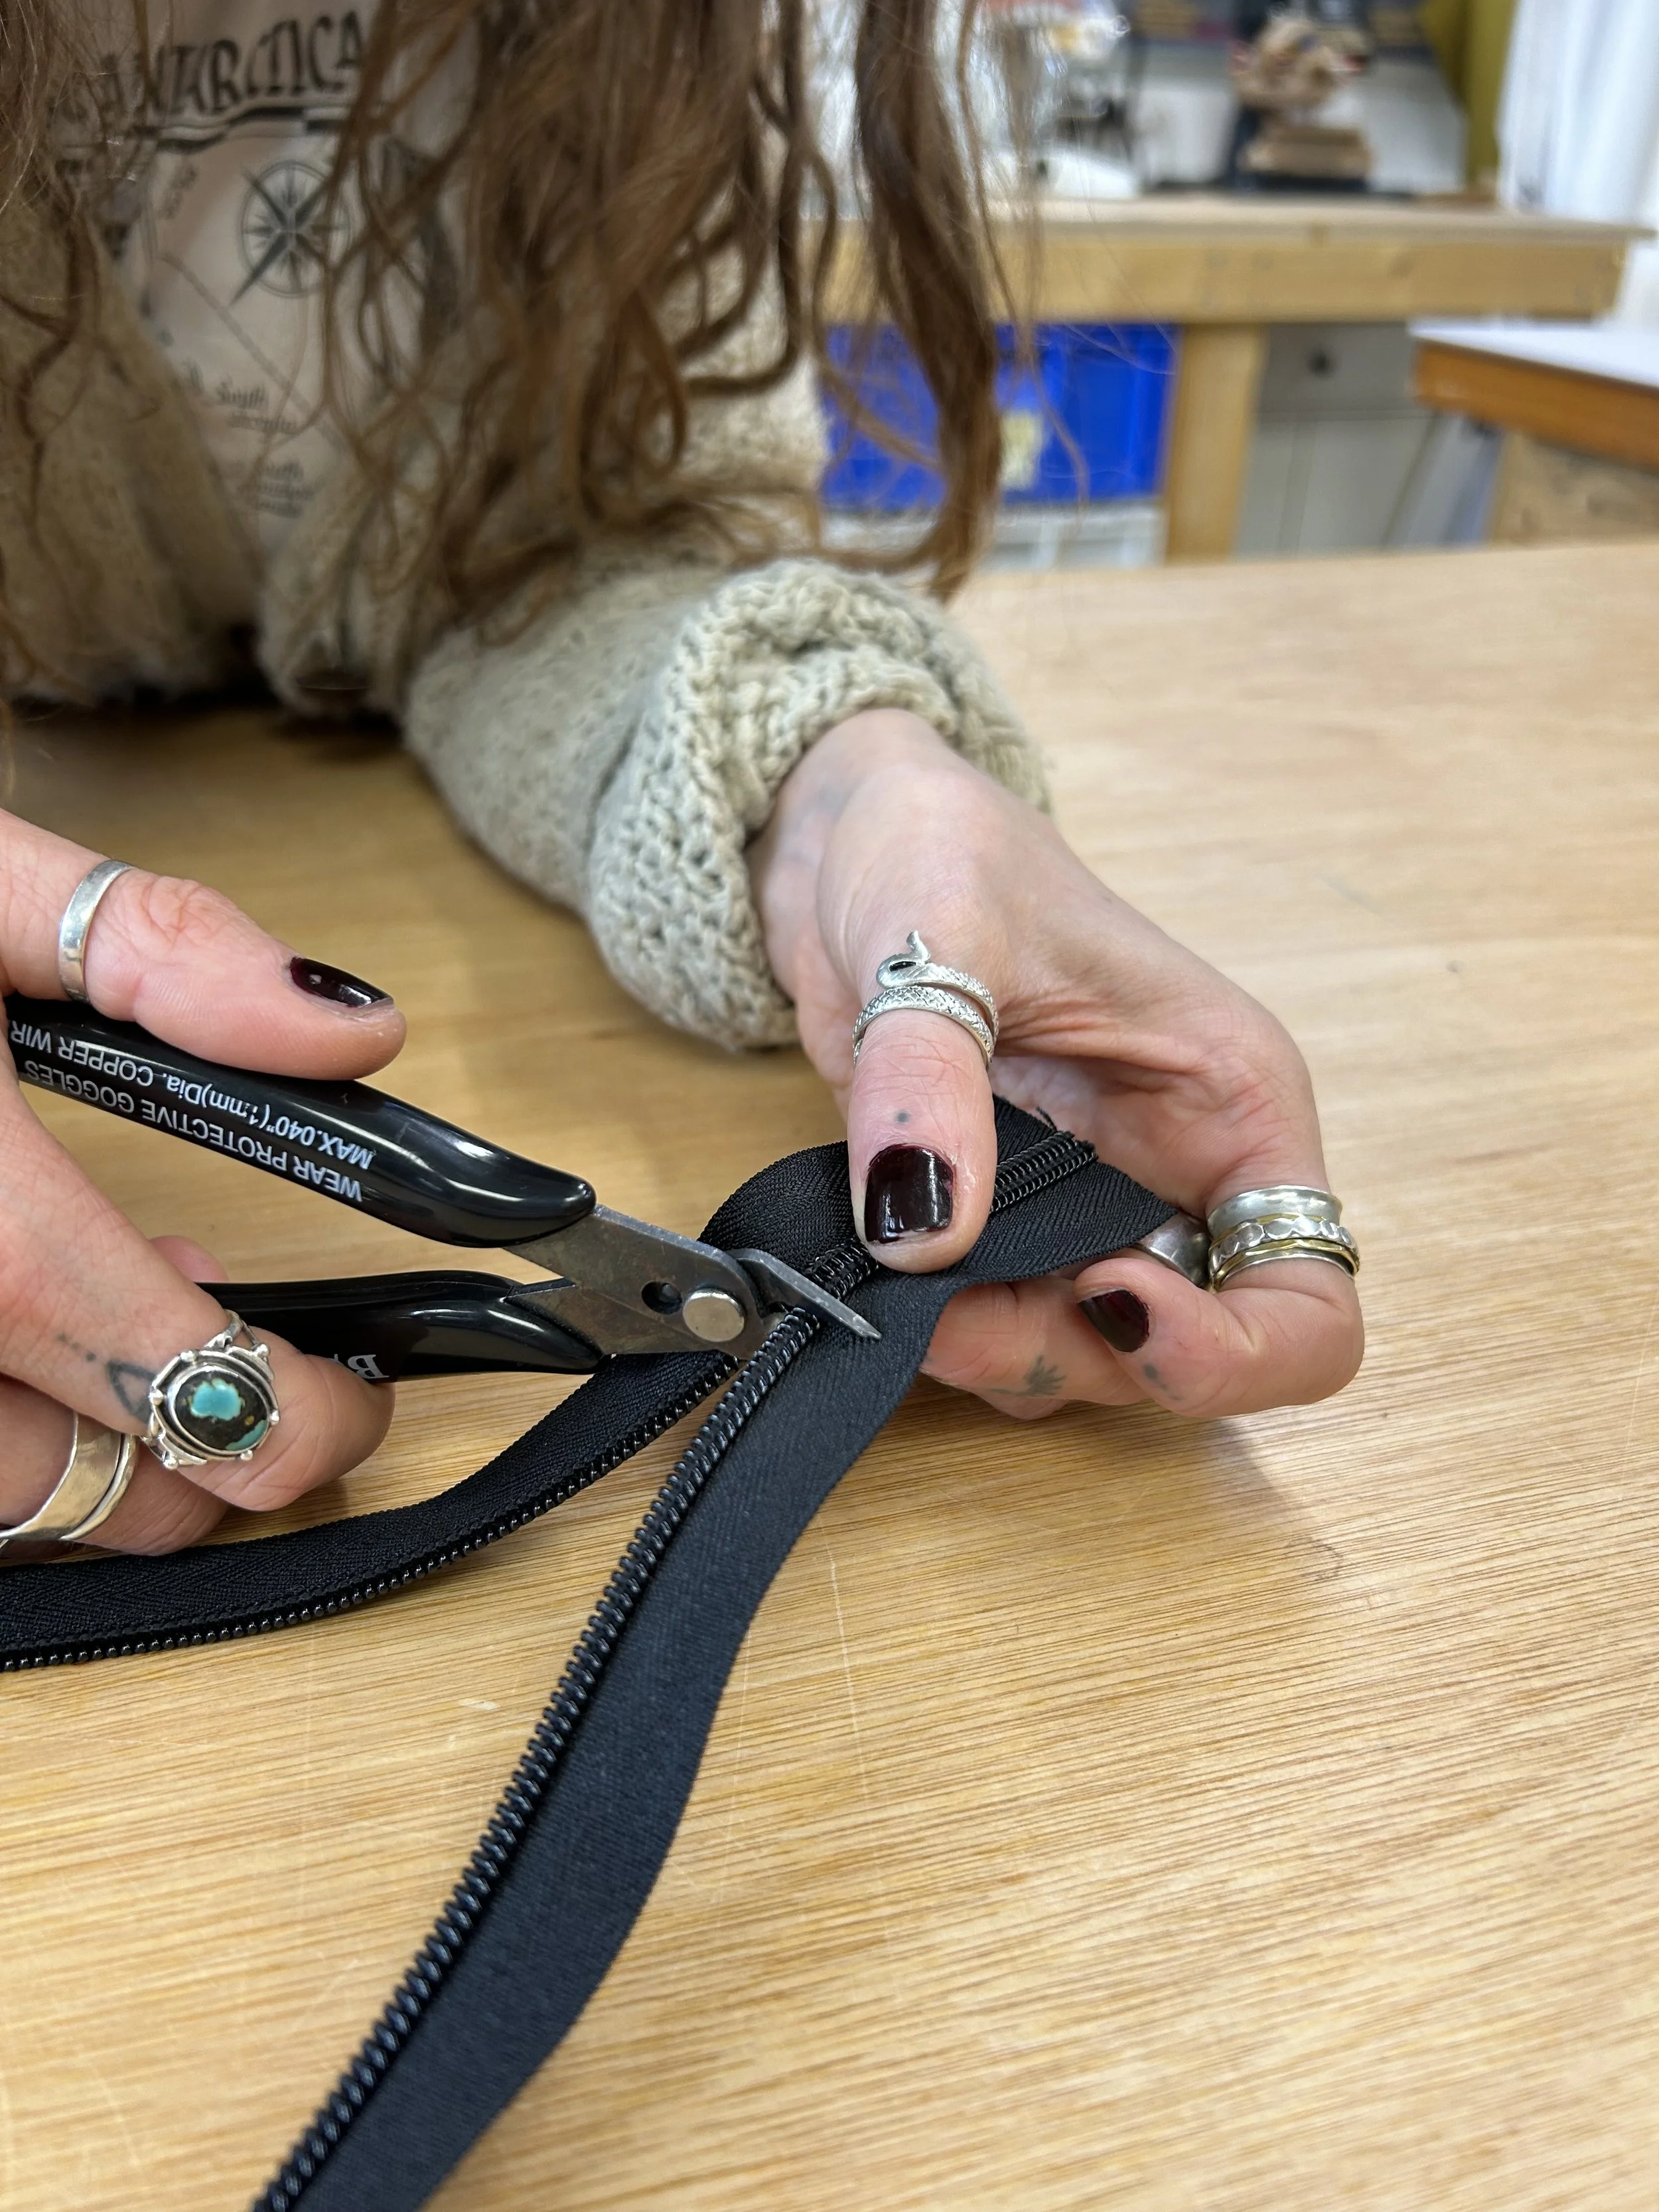
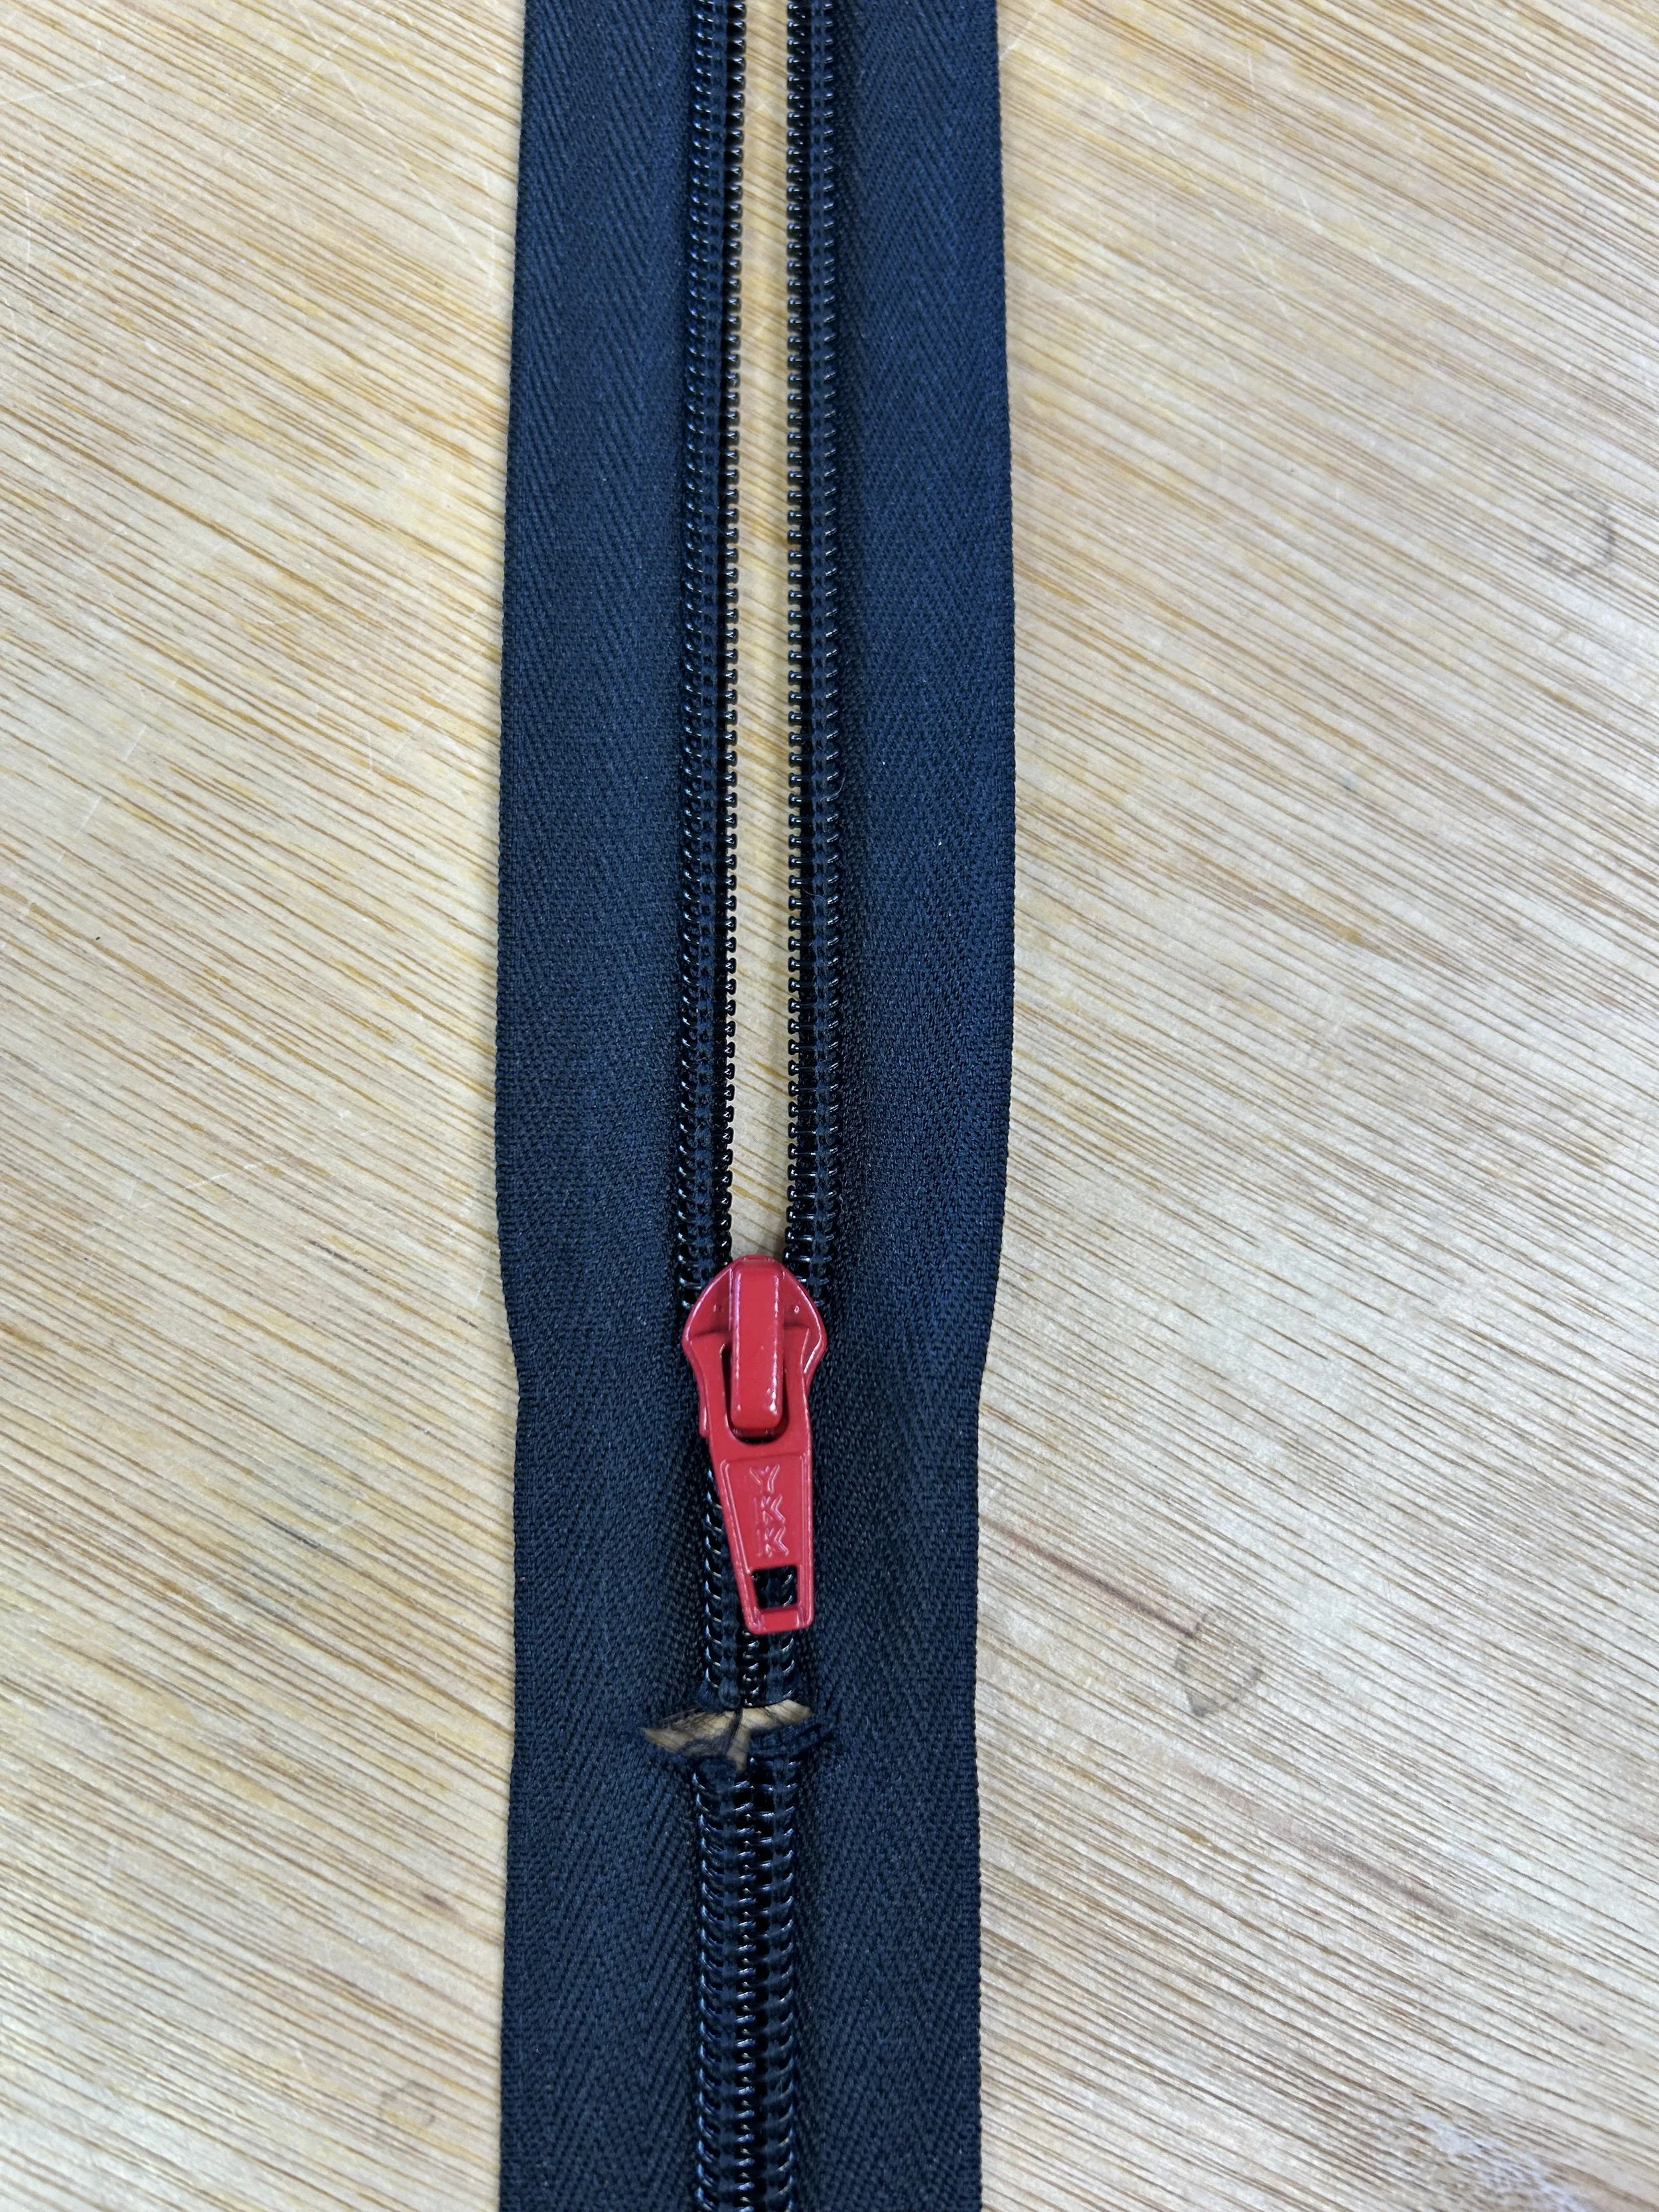
1. Make the snip
Don't snip right at the end of the zip. Leave roughly 1 cm of zip tape beyond the snip to give yourself enough room to work with. Work from the ‘bottom’ end of the zip so you will be able to add the slider going forward.
Using suitable cutting pliers, make a clean cut straight across the zip. Make sure the cut is directly aligned on both sides.
Take care with the garment fabric behind the zip. Check both the front and back before cutting so you don't accidentally catch the fabric with your pliers.
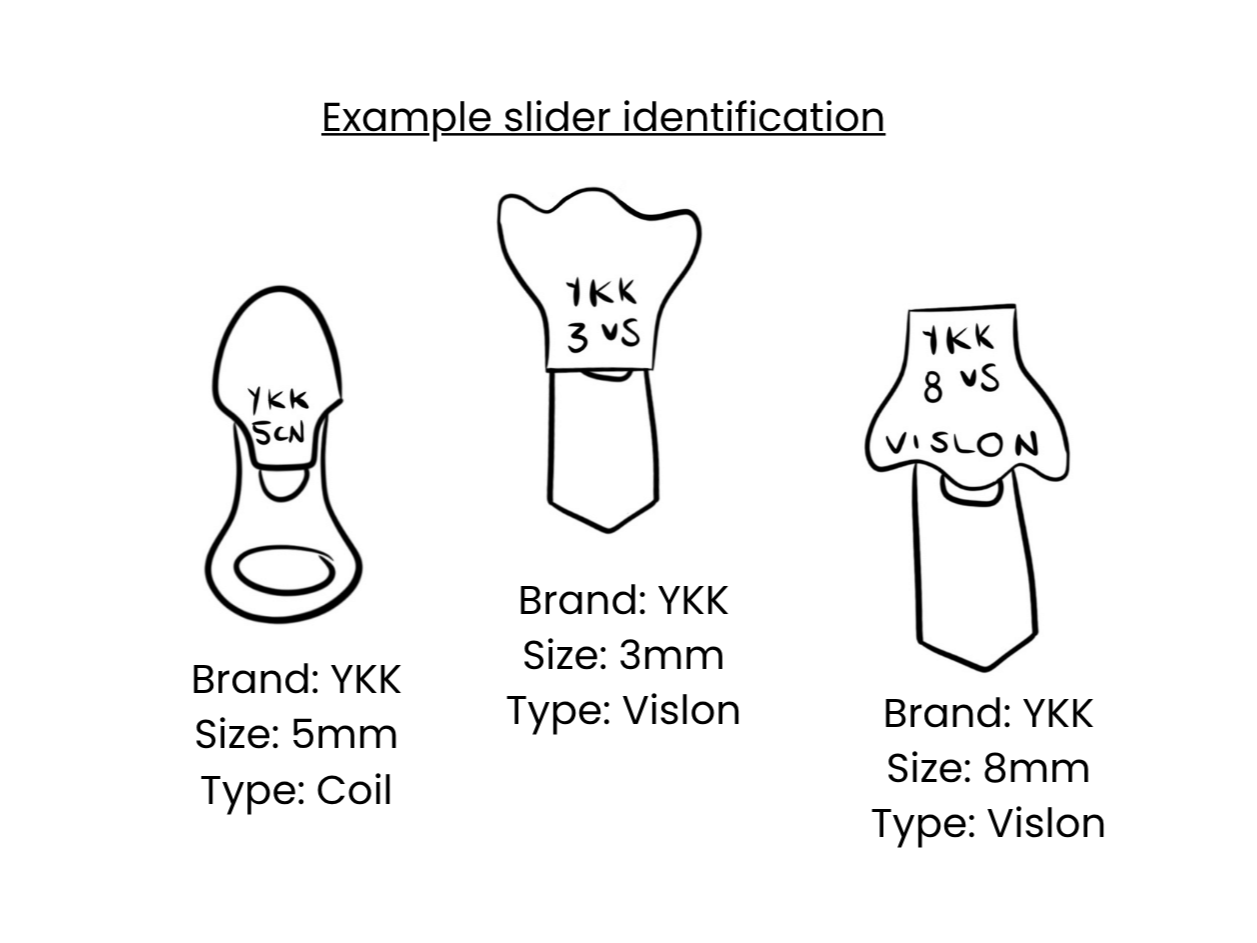
2. Identify the replacement slider
Choosing the correct replacement slider is one of the most important parts of the job.
Check:
Zip type – Coil (C or CN) or VISLON
Size
Brand – for example YKK or another manufacturer
Locking or non-locking slider
Slider orientation / type
If you still have the original slider, use it as a reference when choosing the replacement.
If the old slider has been lost, there can be an element of trial and error. Start with the most likely size and type, then test whether it fits and runs correctly. Our ‘Slider Explainer’ blog has more information on identifying different sliders.
3. Thread the slider
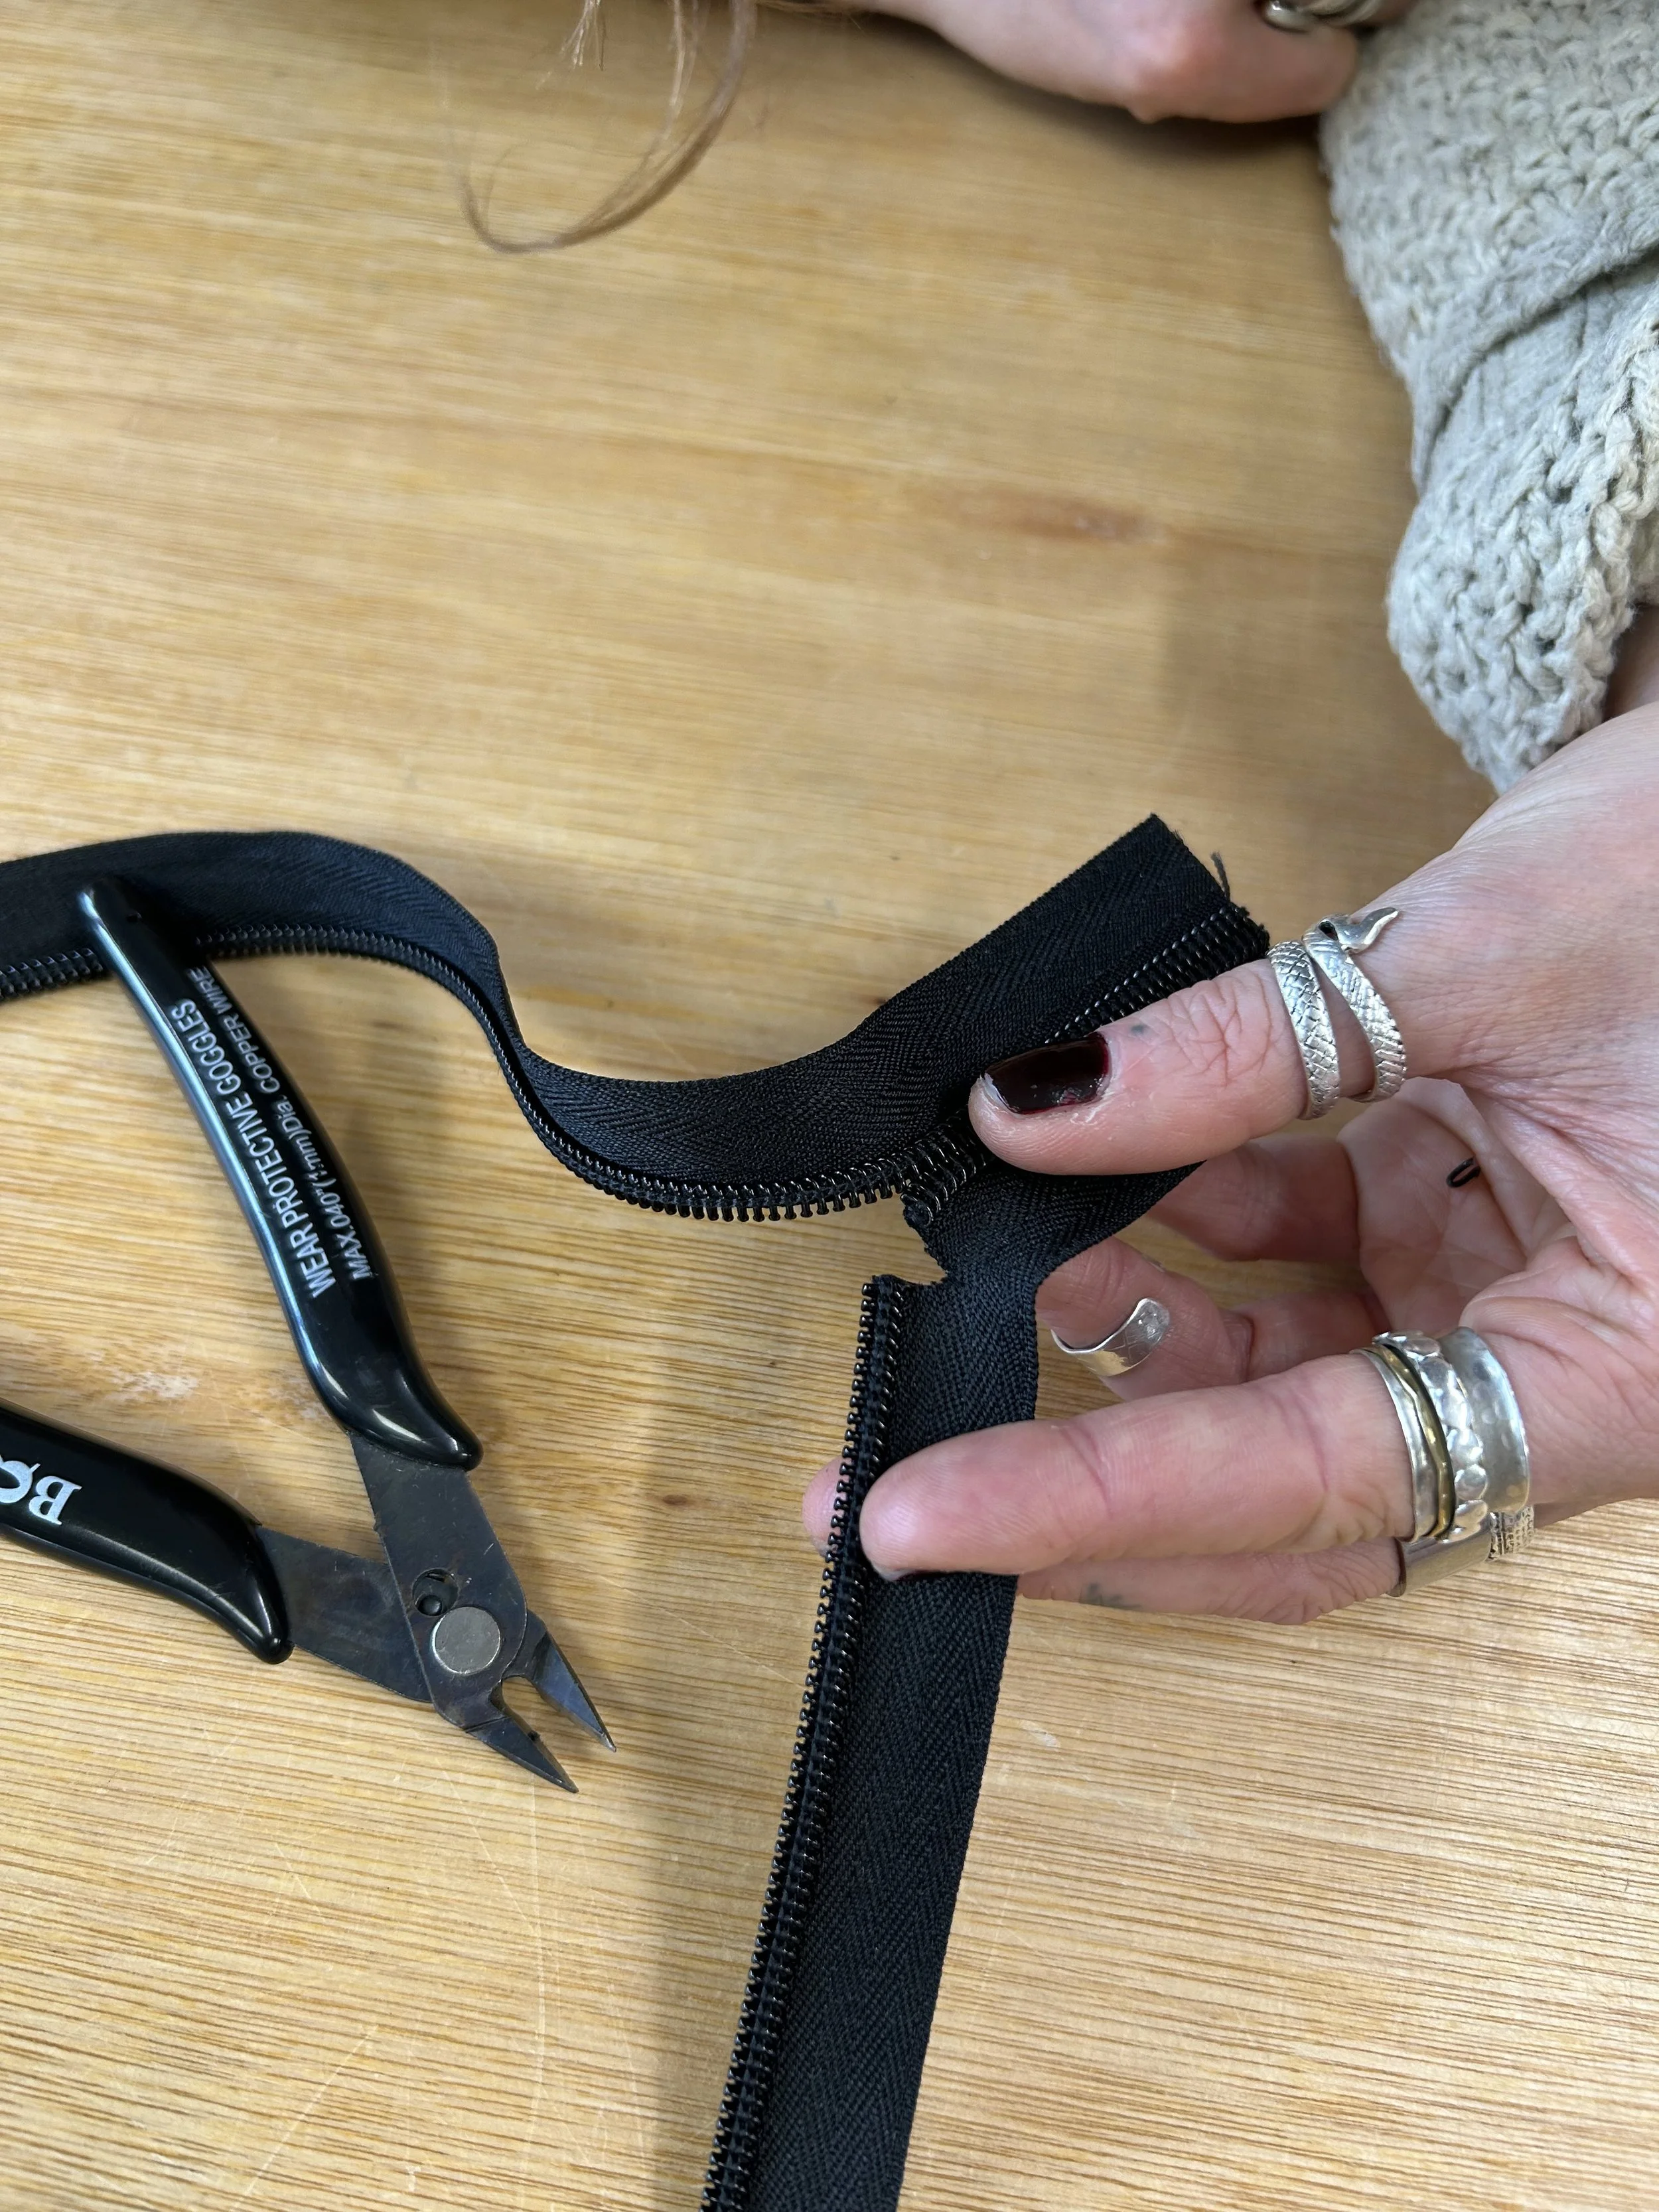
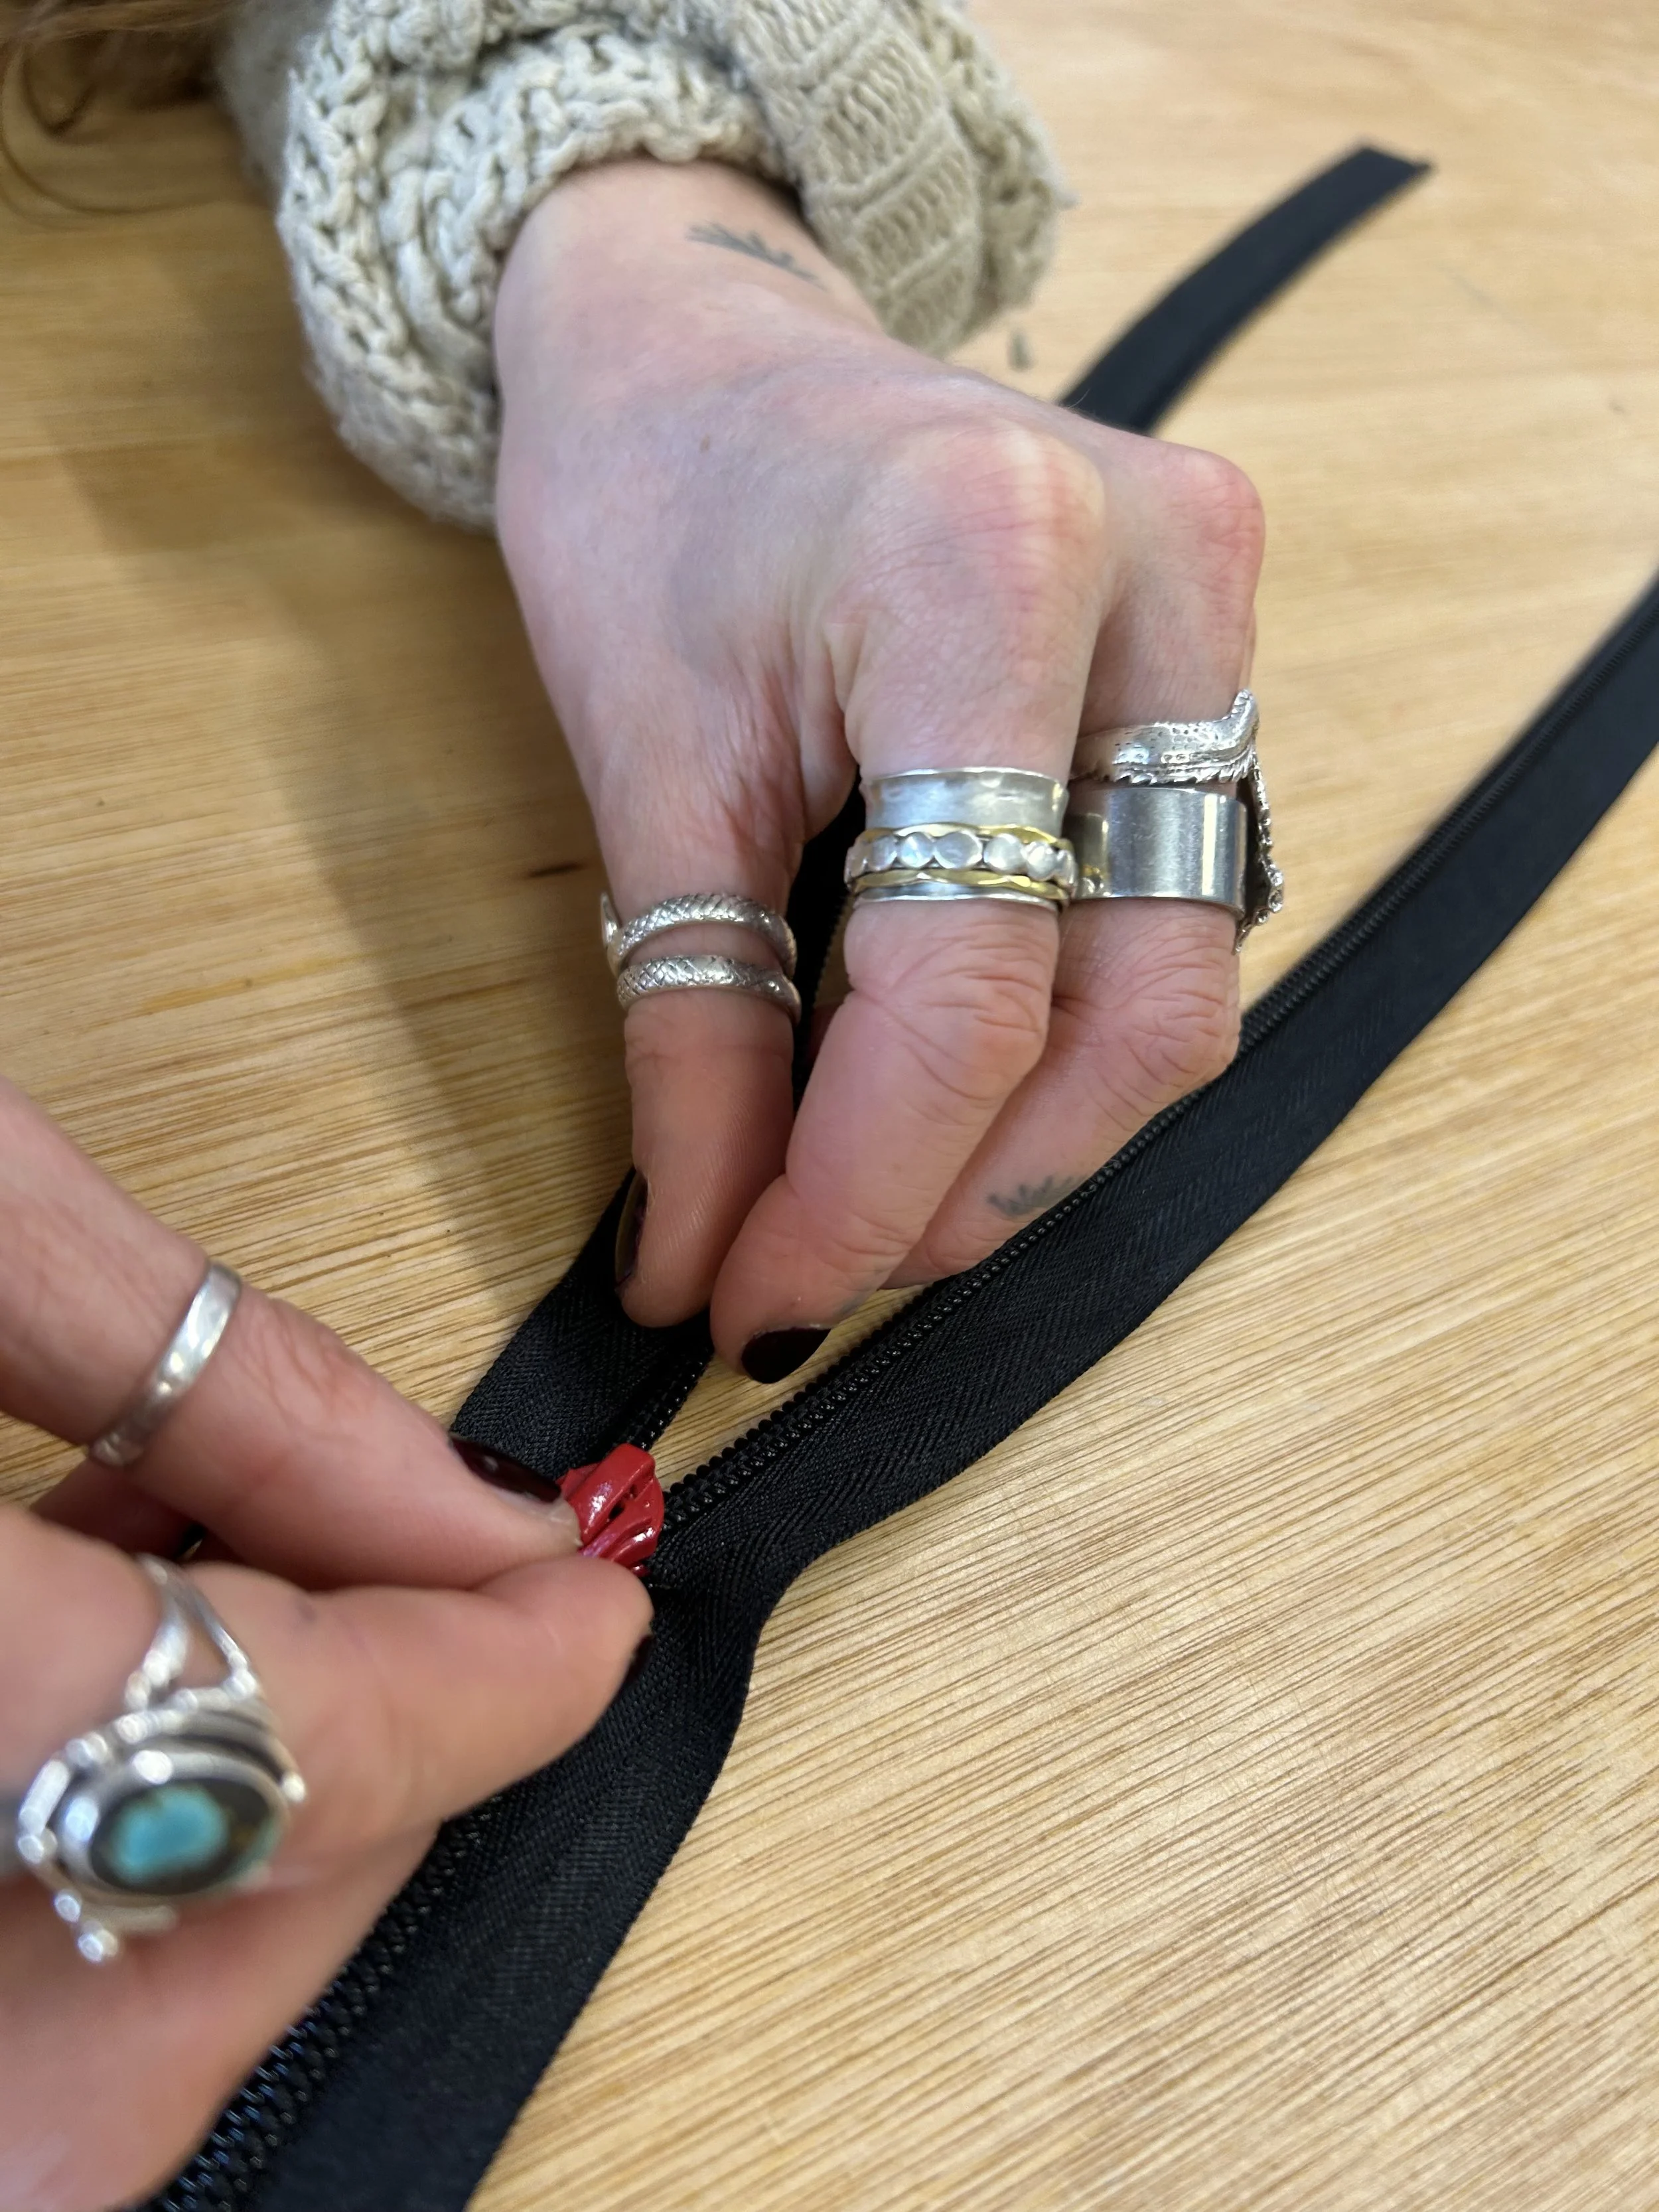
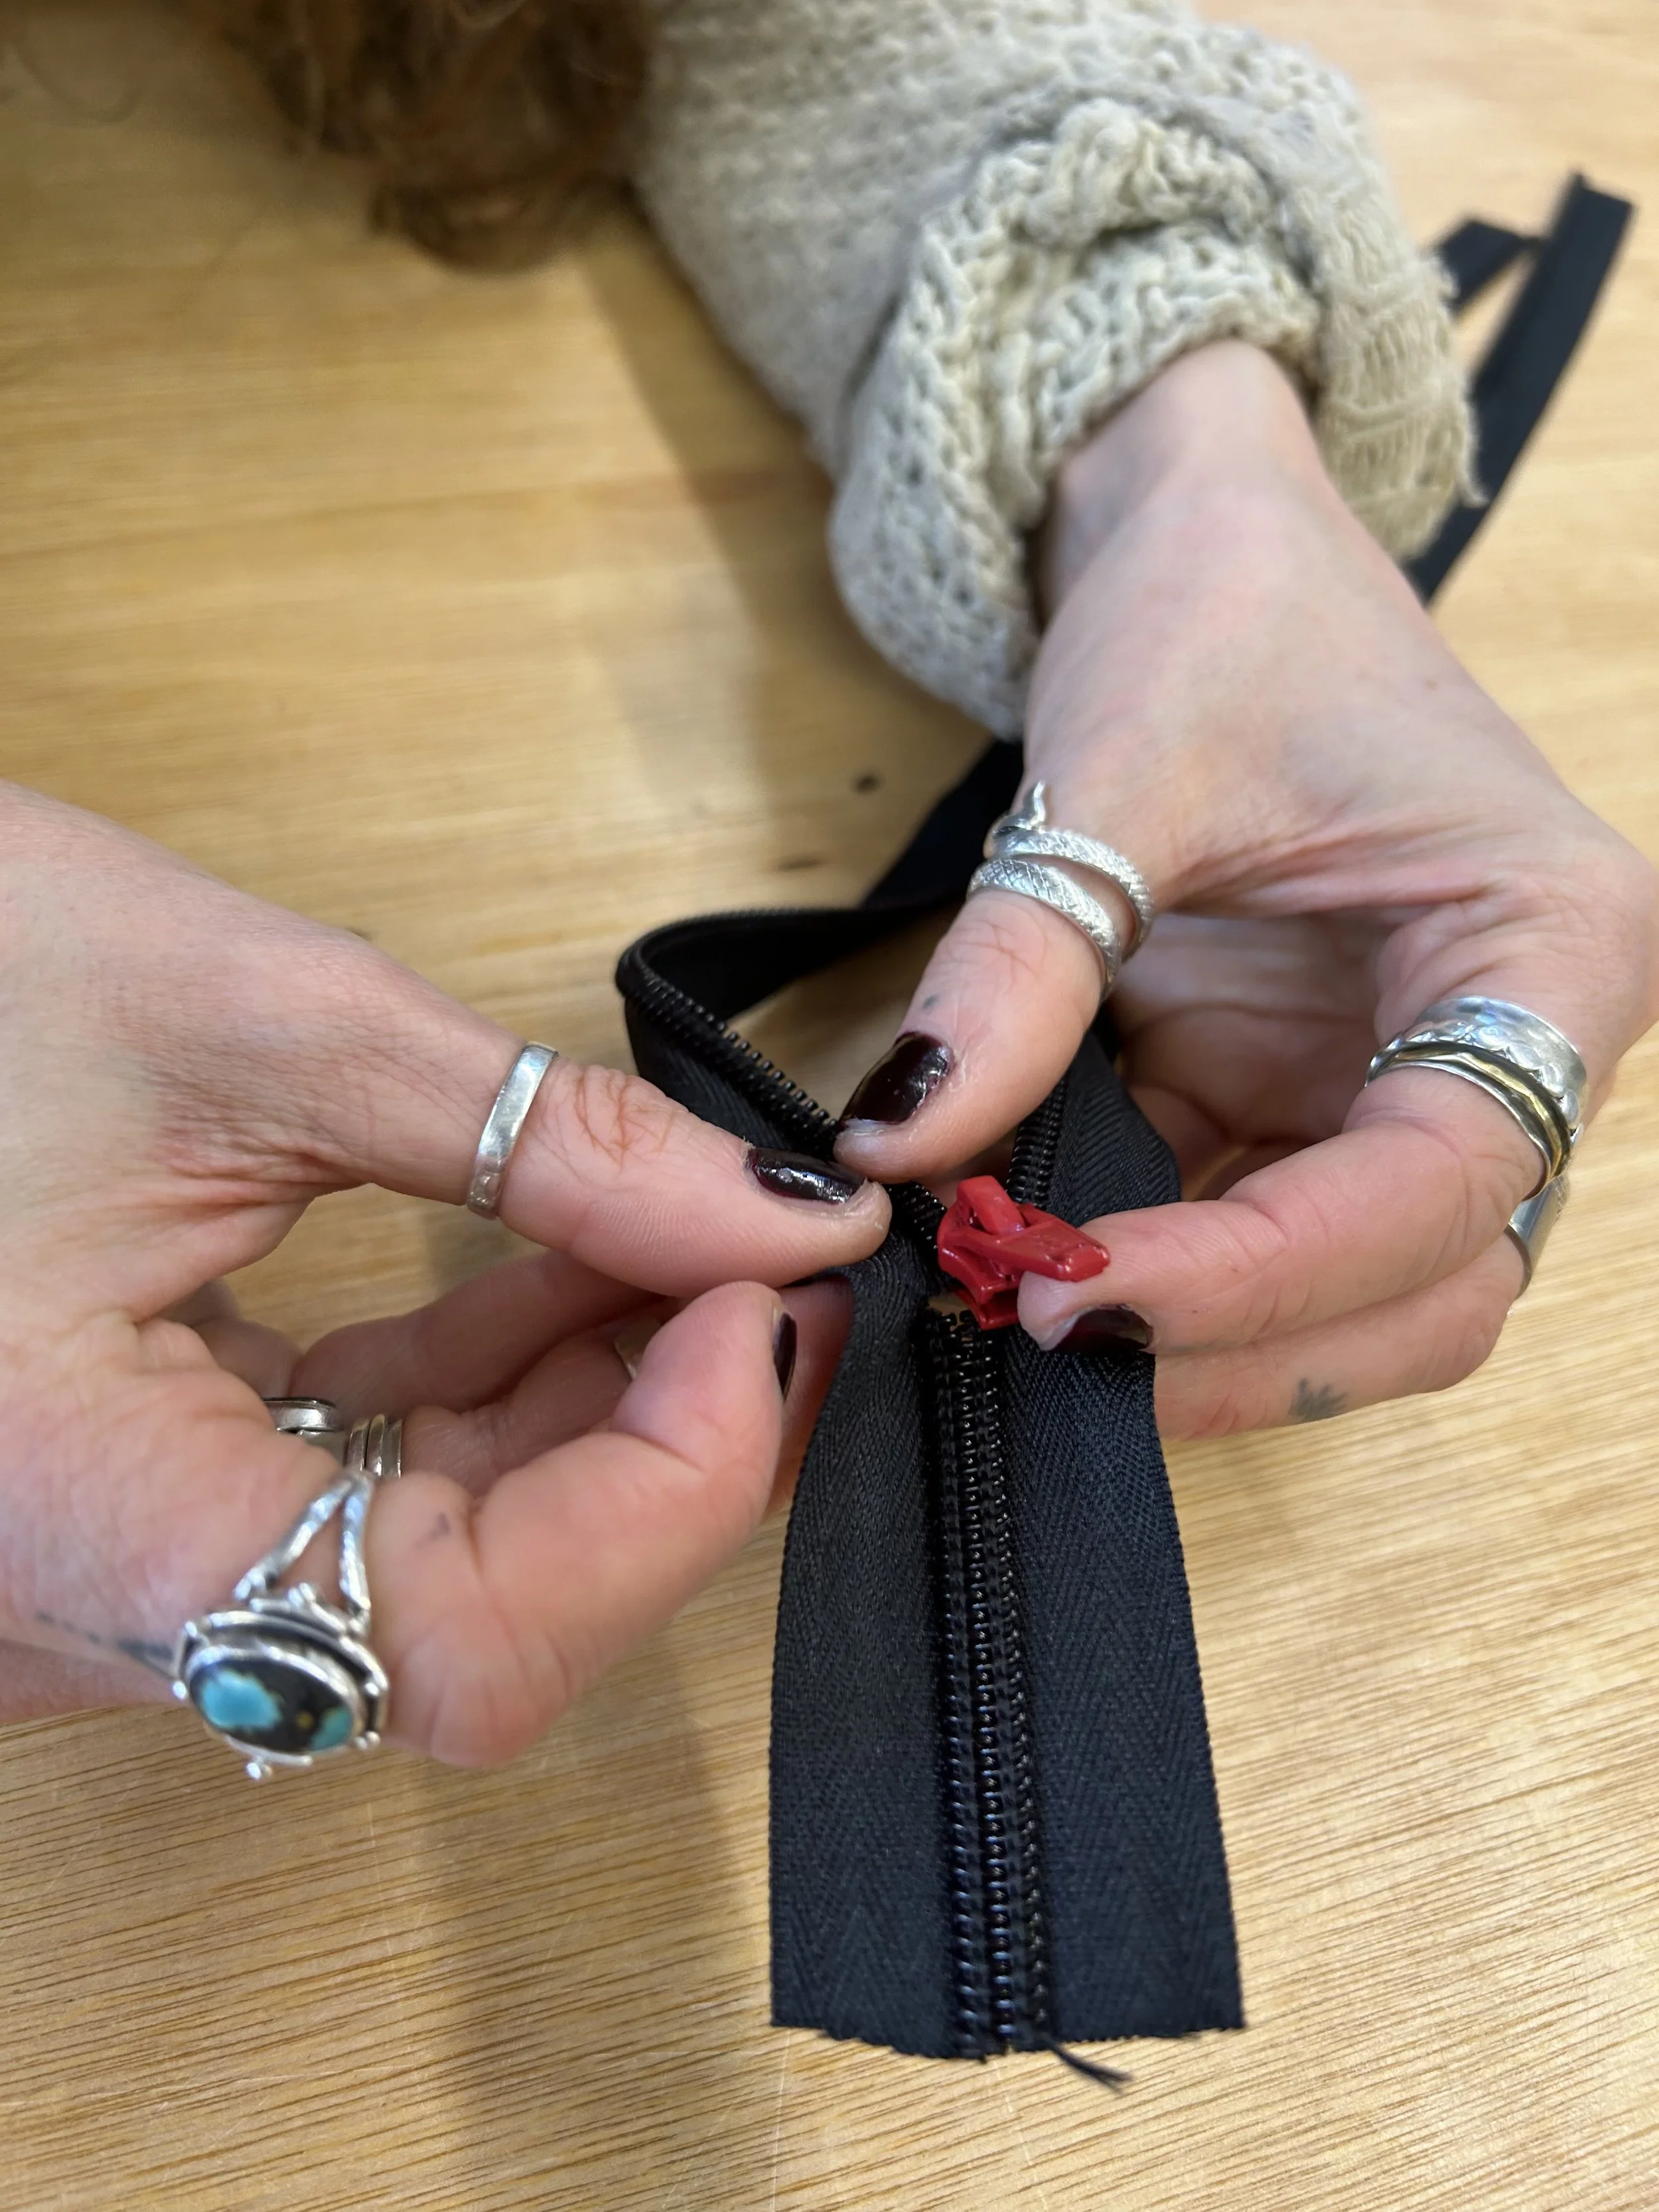
Use the new opening to get the replacement slider onto the zip. Start by getting one side of the zip into the slider, then work the second side into it while keeping both sides aligned.
Once both sides are engaged, gently move the slider back and forth to make sure it is sitting correctly and running smoothly.The two sides of the zip should meet evenly behind the slider.
If one side is noticeably higher or lower than the other, or the two snips don't line up, take the slider off and try again
Don't force the slider if it isn't running correctly, it might just be that you have the wrong slider. See our ‘Slider Explainer’ for more info.
4. Staple the snipped section
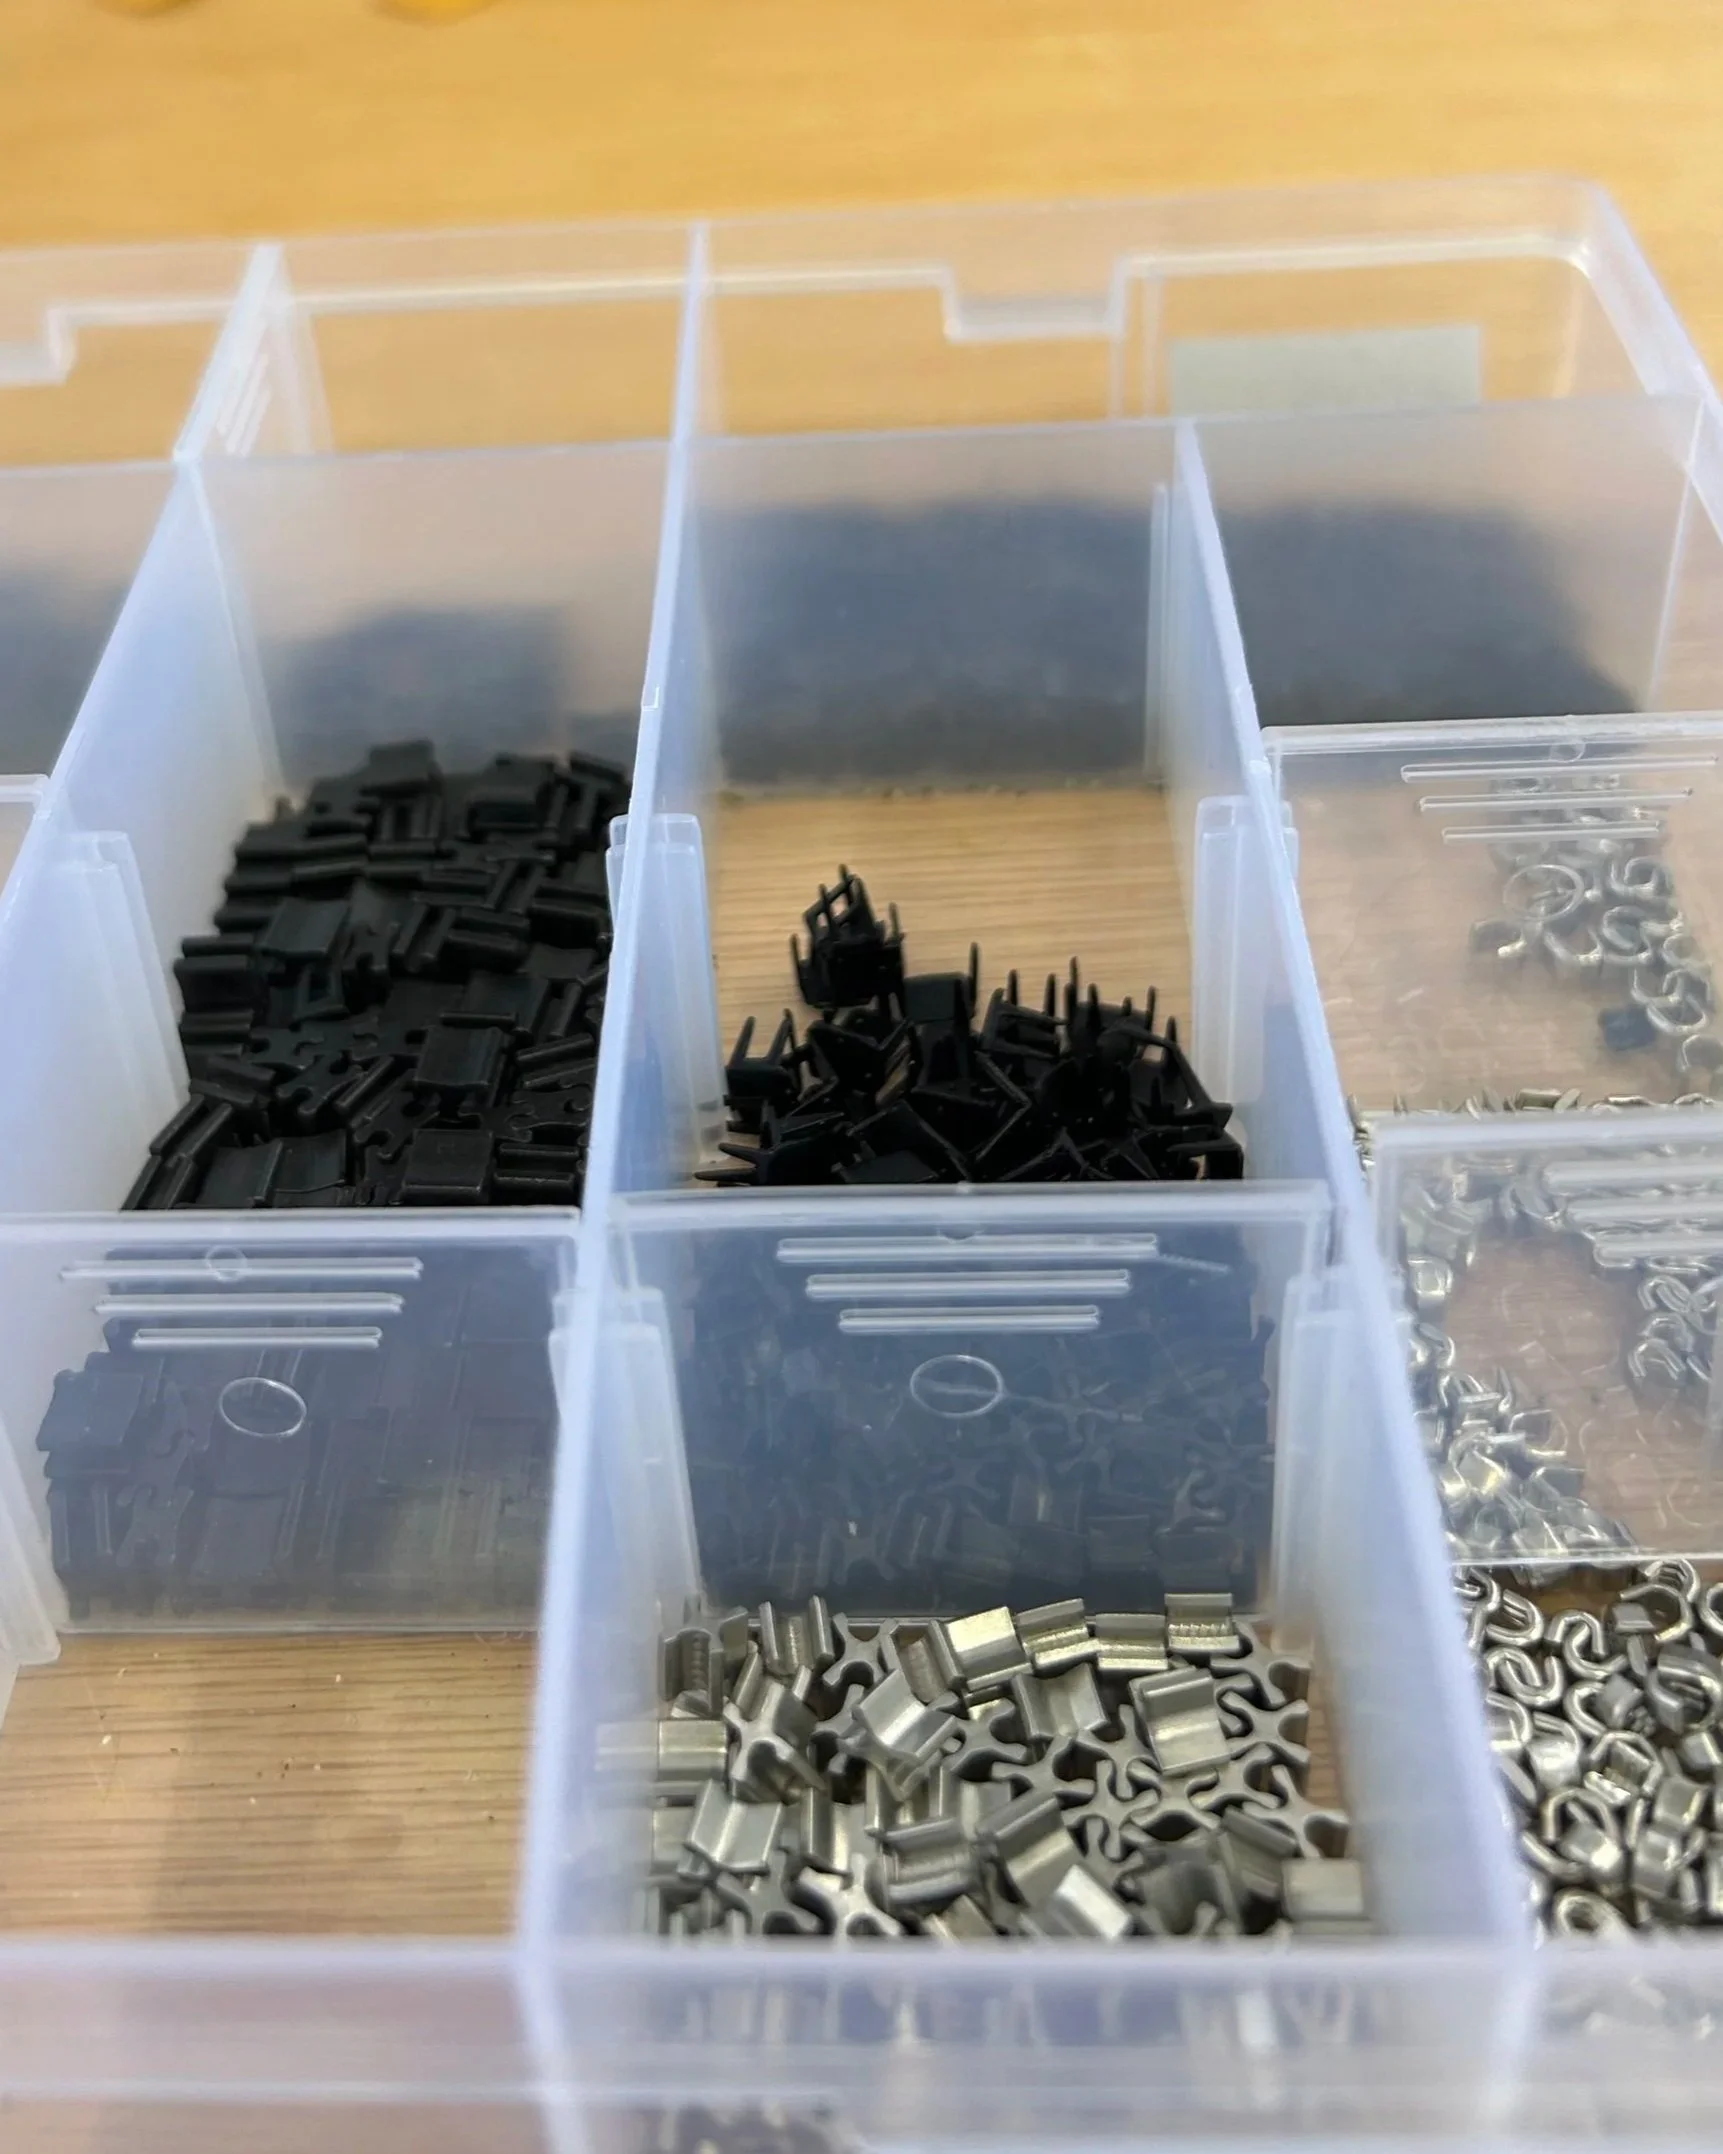
The staple closes the small opening you made in the zip and makes sure you don’t have a run way slider! The staple can be positioned with the spikes facing either way — this is largely down to personal preference.
Pull the slider down the zip, around 10 mm away from the snip. This gives you enough space to access the back of the zip from both sides.
Position the staple just above the snip, making sure it catches the zip tape on both sides of the zip coil or teeth. Push the staple through the tape, taking care not to catch any of the garment fabric with the spikes.
5. Secure the staple
Once the staple is through, use pliers to clamp it down securely making sure the spikes are facing in and the staple is sitting firmly against the tape rather than sticking out.
6. Refit the zip pull
Where possible, reuse the original zip pull. If the original pull can't be removed or reused, add a new one (just cord will do!) - this helps sliders live longer by dispersing the pull pressure.
7. Final check
Give the repair a thorough final test before putting the item away.
Do a couple of full zip cycles, checking that:
The slider runs smoothly.
The zip closes correctly.
The zip doesn't separate behind the slider.
The staple is secure.
The staple isn't catching on the fabric.
There are no obvious signs of fraying around the snip.
Once everything is working smoothly, the repair is ready to go!
Enjoyed this blog? Fancy yourself a repair DIY master? We regularly run repair clubs and classes from our workshop. With full access to our tools and materials. Click below to find out more: